Sunday, September 30, 2012

DIY World Map Pillows

You may have seen our travel page - we love to travel and have been really lucky to share some unbelievable experiences together over the past few years. This year, on the other hand, has been all about planning for the house, and we've been trying to limit our spending (which really isn't fun!). Despite the fact that we'll be taking a hiatus from any serious traveling for a while, we still want our love of traveling to be reflected in our house, and I decided to make some world map pillows for the window seat in our study (not that we've built the window seat yet... or the house with the study... I might be a little over-eager here).
DIY World Map Pillows

I got the inspiration for the travel theme based on this awesome scratch-off-where-you've-been map that my hubby surprised me with a while back:
Scratch Map

Isn't that cool?? I had never seen one of these before, so I was pretty excited when it randomly showed up at our door one day. (If you're interested - if you Google 'scratch map', you should see a bunch of options where you can buy one. The size was unusual (32x23), but by cutting it down a bit, I was able to make a cheap, standard size frame work well enough.) It's currently hanging in our sunroom, and I was thinking that it would be perfect in the study when we move.

I had also decided I want to build a window seat with a comfy cushion and lots of pillows in the study. Then I saw these pillows on Pinterest - how perfect!! (The pin link I had didn't work but after Googling them, it looks like they're from MyBeardedPigeon on Etsy).

Cap'n Crunch Halloween Costume


I'm a pretty awful seamstress, but throw pillows are actually one of the few things I've made in the past, so I knew I could handle sewing together two squares and shoving in some stuffing. I've been away from sewing for a while until recently - I actually thought my husband broke my sewing machine making this super thick Cap'n Crunch hat for Halloween (totally worth it though - he was an awesome Cap'n!).

I had tried to fix my machine a couple of times to no avail, then stuck it in a closet for years (4 years to be exact - I told you I don't sew much!). Now that I've got DIY projects on the brain again, I thought it was time to either fix it or give it away and buy a new one, and somehow, it miraculously works again - hooray!

Step 1 was to buy some fabric. I decided on this one. I liked the vintage look of it, that it's got some color but is still fairly neutral (since I don't have a color scheme picked for the room yet), and that the price wasn't bad at $8.75/yd. (also I ordered 2 yards, and they sent me well over 3 - I think I like Fashion Fabrics Club!). I was hoping the print would be larger though (maybe like a hemisphere per pillow), but it's actually fairly small and several 'worlds' fit on each pillow - I wasn't too excited about that. The Pinterest pillows are definitely a lot more fun, but I still think these will be nice for a study (and after close examination of the fabric, Aria decided she liked it too and didn't want to get off of it).

DIY World Map Pillows - Aria Helps
Materials (for two 18x18 pillows and one 12x20 pillow):
  • 2 yards of fabric 
  • 2 12-oz bags of stuffing
  • Sewing machine/thread/needles
Total cost: About $25 for 3 pillows including shipping costs

I didn't do anything special with these - they're just your basic throw pillow. If you've never made them before, all you do is cut out two squares (or rectangles) slightly larger than you want your pillows to be, pin them together inside out and mark out where you'll sew, then sew around the whole thing except for the last couple of inches (plan it so this open bit is on the bottom of your pillow). Use that little hole to turn the pillow right side out, and then to put in your stuffing. Once it's as stuffed as you want it to be, then you can sew up the last couple of inches by hand.

Here's how mine turned out (and rather than sadly sitting on the floor alone, picture them on a long window seat with a bunch of other pillows):


DIY World Map Pillows

Monday, September 24, 2012

DIY First Dance Frame

We've been married for over three years now, and despite the fact that we had an amazing photographer (check out Teresa Choi Photography) and that we ordered a big stack of photos, right now they're just sitting in a pile and we haven't put any on display. We have such a small amount of wall space in our condo, and since we were living here for a few years before we got married, it was all pretty much taken up already and we never found a spot to put any of our wedding photos. In the new place, we'll finally be putting some of those photos up - starting with this frame of our first dance.

DIY First Dance Frame


On Pinterest, I came across a pin with a product made by Lovely Written Words on Etsy - the lyrics from your first dance written on a mat to frame a photo of your dance. How cute! The real-deal version is lovely, handwritten, and very reasonably priced (and requires no work!), so I would definitely recommend it! But since I'm trying not to spend any extra money, I wanted to make something similar myself.

Materials:

  • 8x10 picture frame
  • Scrapbook paper
  • 5x7 print
  • Card stock
  • Poster board

Total cost: $6.50 ($3.50 for a sale frame at Joann, $1 for scrapbook paper, $2 for the print, I had leftover card stock and poster board on hand)

First, I decided on a picture. Rather than one, I decided to use a series of three - I like how this captures the movement & mood of our dance. Of course, using a single picture would work just as well!

My handwriting is not something that should be framed on anyone's wall, so a handwritten one was definitely out for me. I Googled 'free fonts' and found this one at 1001 free fonts:
This was actually the very first font listed on the website when I looked as one of 'today's free fonts' (so I'm guessing this particular font isn't always available for free? I'm not sure exactly how that website works...) I was pretty lazy about selecting a font since the first one I saw was right in line with what I had pictured using.

Next step was to grab the lyrics. Our song was More by Bobby Darin. Before we got married, we didn't already have something that we considered 'our song', and we decided it would be fun to dance to a swing song for the first dance. We thought 'More' was perfect - classic, sweet, and upbeat.

I pasted the lyrics into Word and put them in my new fancy, schmancy font, using font size 30. I moved the margins so they were 8x10, then put a 5x7 white rectangle in the center where the photo would go and had the text wrap around it. This is what my template looked like in Word:


Then I printed the lyrics template on my scrapbook paper. I was being indecisive in the store (this is a common problem for me!), so I ended up buying three different kinds of paper to try out. They each had a different look & feel and printed out very differently.


I decided on the tissue-paper-thin one since the lyrics were easy to read (unlike the metallic one) and I thought it was a bit more unique looking than the iridescent textured one. To bring out the white-on-white pattern of the paper, I also decided to put a piece of black card stock behind it.


Since the border of my photo was white like the paper, I cut out a piece of black card stock to frame the photo. Then to give the frame more depth, I cut out a piece of poster board to raise the photo. Using scrapbooking photo squares, I attached the photo to the 5x7 black card stock, the black card stock to the poster board, the poster board to the paper with the lyrics, and the lyrics paper to the 8x10 black card stock backer.


Then I put the whole stack into the frame. Here's the finished product (although I think it looks better in person - I was struggling to get good photos!):


Wednesday, September 19, 2012

DIY Black & White Photo Mirror

I'm reaching way back for this one. I actually made these mirrors for my undergrad apartment, circa 2004-ish. But I still think they're pretty cool!


Materials:
  • Mirror(s) (I made 2, and they were Ikea Malma mirrors - not sure if they're sold anymore?)
  • Photos (I bought a B&W photo magazine to use)
  • Scissors
  • Paint & paintbrush (if you want to paint your mirrors)
  • Glue & clear gloss or Mod Podge
Total Cost: For 2, I think it was about $6 for both mirrors, and $5 for the photo magazine. I needed to buy the paint & gloss so depending on your supplies, it should be possible to make for about $10-15 total.

If you are painting your mirrors, start by getting this step out of the way. My mirrors were unfinished, and I decided to paint them black.

Next, determine which photos you want to use and cut them out. I bought a black and white photography magazine to make mine and just used the photos that caught my interest. If I were making this now, I would probably use my own photos since I've gotten more into photography and have traveled a lot more - I like seeing my own memories on the walls. (That being said, I love professional photography too, and of course the ones from the mag are about a million times better than anything I've taken.) I used black and white photos because, well, I like them, but also because it helps to tie the photos together and create a more unified look if you're using photos that are otherwise unrelated. But I'm sure you could make an awesome version that's more colorful too! 

Figure out the layout for your photos, then glue them down. I had never heard of Mod Podge until recently (remember, I made this in the pre-Pinterest era!) and haven't had a chance to actually try it out yet. I'm guessing this would be a good project for it? In my (even more) Mod Podge ignorant days, I just glued the photos down and let them dry, then put a clear coat of gloss on top. 

Due to our lack of wall space, my mirrors currently reside in the entryway of my walk-in-closet. It was a little awkward to get photos (especially since there is a pile of shoes crammed behind my door and I can't open it all the way...) - but I think you get the idea!


p.s. - Apologies for the lack of photo credits for all of the photos included on my mirrors! Unfortunately, I don't have the names of the photographers or even the name/issue of the magazine these were from. If, by chance, you happen to know any of the photographers, please let me know and I will update my post!

Tuesday, September 18, 2012

DIY Wine Cork Board

I first saw a wine cork board for sale at a winery a few years ago. I thought, That's cool! followed by That's expensive! and finally, That would be easy to make! I made this a while back so I didn't take pictures during the process, but it was a quick, fun project so I thought I'd make a post about it. The best part was getting the cork collection together!


Materials:

  • Picture Frame - I used an 8x10 since I got impatient waiting for the corks
  • Corks - Mine took 50 corks (49 for the main design and 1 to slice up for filler spots)
  • Glue gun 

Total cost: $3 for the frame (and well, the cost of the wine too, but I don't think that counts since I'd be drinking it anyway!)

First, save up your corks. This took me a while since Bryan's not a wine drinker, so the sole responsibility for drinking all that wine was on me (tough job, huh?). I got this wine bottle gift box at Micheal's - I keep it on my counter and throw my corks in whenever I open a new bottle. The most annoying part about the corks was how many plastic corks I kept ending up with - I gave up and used both real cork and plastic, but making it all our of real corks would be nicer I think.


Once you're actually ready to make it, decide what pattern you want to use. I used two corks alternating horizontal and vertical. I've also seen some that are just straight across and others in a zig zag pattern. Also determine how you want to handle the edges. I just stuck a straight line of corks on the edge, which is not the prettiest but was the most simple thing to do.

Start by taking the glass out of the frame so the corks will sit directly on the backing, then lay out your corks in the pattern you decided on. I had just enough corks to make it work, and a few were shorter than others, so I sliced up some slivers of another cork to fill in any gaps. I think this could be avoided by using corks that are the same size and by being more careful in laying out your pattern.


Once you've got them laid out, then use the hot glue gun to glue your corks to the back of the frame. Then just keep on gluing until you're finished!

Here it is on my kitchen wall (admittedly a bit lumpy and not the neatest looking job, but hey, it works!). If I do this again in the future, I also want to make a bigger one with a more interesting frame.


Monday, September 17, 2012

DIY Dog Car Seat Hammock

We take Smokey in the car with us frequently, and while both my car and my husband's aren't exactly what you would call neat & tidy, I still thought it would be helpful to have a doggie car seat. Smokey loves climbing all over the car, rolling around in the mud, and digging holes in the dirt, which the car seat should help with - plus he loves curling up in cozy fabrics, so I thought it might make the car a little more comfy. I made a super cheap, super easy hammock-style car seat for him. There are a number of ways I could have made this a bit nicer, but I went for functional/cheap/quick over durable/attractive (but of course, this method could be easily adapted).


First, gather your materials. All I bought was the fabric and elastic - pretty simple! Smokey was curious about the project right from the start. Basically, this is just a sheet of fabric with 4 elastic loops to fit around the front and back headrests.


Materials:
  • 2 yards of fabric (I bought flannel because it was 50% off and it's cozy, but I'd recommend using something more durable): $5.98
  • Elastic (1" x 2.5 yds): $2.79
Total cost: $8.77

Additional supplies:
  • Sewing machine & thread
  • Scissors
  • Measuring tape
  • Pins (My straight pins were missing so I had to go safety-style)
Next, measure your car. Since I bought my fabric before measuring the car (which is sort of backwards now that I think about it...), I found it easier to just take the fabric and spread it across the back seat to check the dimensions. It fit nicely, so I didn't end up cutting it at all. I just measured the width of the headrests and the distance between headrests, so I knew where to put the straps.

Then I cut the elastic into 4 even pieces and pinned the elastic on the fabric based on my measurements. You should end up with 4 loops of elastic that will fit around your headrests.

As you can see, my fabric edges are rough - it would have been better to fold over the edges to make them more durable, avoid fraying, and make it look less rough. I didn't do this for two reasons: 1) the fabric was already a little on the short side and I didn't want to make it any shorter, and 2) I'm lazy.

Next, I sewed on the straps. First I just did a quick straight stitch and checked to make sure it fit in the car properly, then I sewed those suckers on good and tight using a zig zag stitch.

And then... you're done! Pretty easy, right? This was a very quick and easy project for me (and my sewing skills are not-so-hot).

The hardest part of the whole project was trying to get some photos. I put it down on the floor, and then Aria immediately came over and burrowed under it.


Then Smokey came over to see what was going on, so Aria gave him her infamous glare and left.


But as soon as I folded up the car seat, Smokey decided to lay on it.
 And sit on it. I guess that means he likes it at least!
At that point, I gave up on the indoor photos and tried it out in the car. I actually made it to fit my husband's car, but tried it out in mine since he wasn't home. The drawback of mine is that it doesn't have headrests in the back seat, but I was able to loop the elastic around the corners and that seemed to work.

Smokey's reaction? Furiously rubbing his back all over it and doing somersaults...
 Then finally getting comfy.
I've only tried it out on a quick little drive, but so far, he looks like one seriously happy customer!


Friday, September 14, 2012

I (don't) love surprises

Right now we're in a waiting period, so nothing too exciting is going on. We're waiting to get our grading plan approved by the county, and we should be submitting for our building permit soon. Boring! I just want them to get started! We recently hit another surprise in the process though, and since there isn't much else to write about at this stage, I thought I'd mention some of the surprises we've encountered so far:

  • Land, take 1: We signed the contract for our first lot and by the end of the feasibility period, everything looked good. We thought we were good to go, then SURPRISE! - two weeks before closing potentially catastrophic soil problems were discovered and we had to completely scrap it. It was super disappointing but saved us from what could have turned into a nightmare.
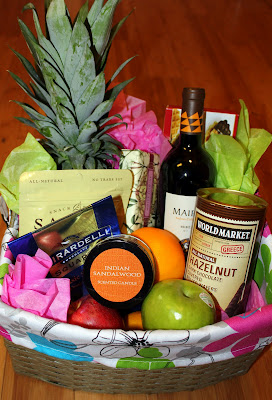
  • Encroachments: About a week before we closed on our actual property, the surveyors found out there were two encroachments on our land. The neighbors in the back had a small fenced in garden that was a few feet over (not so bad, right?), and the neighbors on the side had a brand new, stone patio that was really far over the property line as shown in the pic. What a great way to start a relationship with your future neighbors: "Hi, nice to meet you! Please rip out the beautiful patio you just installed a month ago!" So, we brought them a gift basket. Totally makes up for ripping up a patio you just spent thousands on, right? Ugh =/
  • Easements are expensive: Even though our property had 'public water and sewer available', apparently that doesn't necessarily mean it's right at the lot. We found out we needed to get an easement to run the sewer line across a neighbor's lot to hook up to it. In addition to the regular sewer tap fee of about $7500, we found out we were looking at an additional $15K to run it though the neighbor's lot. We were not too happy but factored this extra cost into our loan.
  • But sometimes easements aren't expensive: More recently, we found out that we shouldn't need to pay the extra $15K easement fee after all. Bryan talked to a guy from the county who said that the developer already paid the needed fees for the spot we're tapping. I don't want to jinx it, but this one could actually be a good surprise for us if it turns out to be accurate.
  • Plans change: I mentioned before that I was excited about our long backyard, but unfortunately, once our inital grading plan was rejected by the county, we found out that we have to move the house back further on the lot so that the house is situated more in the middle. Kind of a bummer, but not too big of a deal - we'll still have plenty of space in the back.
We had been warned that there would be plenty of surprises for us in this process, and I'm sure there will be more to come (but hopefully nothing major!). I'll feel a lot less anxious once the site work is over and the house is actually going up!

Saturday, September 1, 2012

{Building the House} Our Vendors

Here are all the vendors we're working with to build our house. I've included links to all of their websites, but if you have any additional questions, feel free to contact me.

Realtor: Grace Miller

Grace has been amazing. Seriously, I don't know what we would have done without her. If you're going to use a Realtor when building a home, it's really important to find one with experience in new construction since the process is so different. Grace has been immensely helpful to us throughout the process - helping us to understand construction to perm loans and finding a lender, helping us understand the site work and coordinating with the engineer, coordinating with the builder, and of course, helping us through not one but two land contracts. She has really gone above and beyond, and we can't thank her enough! (PS - I'm sure she would be just as fabulous for existing real estate too!)

Builder: ANV

We decided on ANV largely because of their standard features and attention to detail. Although we haven't started building yet, we've been very impressed with them so far.

Engineering: LAND Engineering, PLC


ANV recommended that we work with Lloyd Ntuk at LAND Engineering. Lloyd has been very flexible, professional, and easy to work with. He's been straightforward in bringing up the issues we've encountered, has happily changed things around based on our preferences (e.g., flip the house around, make the garage side load, put the basement exit on the opposite side). 

Site Work: Demarr, Inc.


Another recommendation we took from ANV was to hire Bob Demarr for our site work. We are excited to start working with the Demarr team once our site work begins.

Lender: Sandy Spring Bank


When we first started thinking about doing this, we started out by approaching our current mortgage lender, Wells Fargo. We were informed that they typically require 40% down for construction loans (40%?!?) and got a flat out recommendation to look elsewhere since they do them so rarely. Grace recommended that we talk to Jeff Starcher at Sandy Spring. Jeff and everyone else we worked with throughout the process was extremely informative, friendly, and eager to help. Their construction to perm loans also had better terms than everywhere else we checked into.