

Materials:
- Picture Frame - I used an 8x10 since I got impatient waiting for the corks
- Corks - Mine took 50 corks (49 for the main design and 1 to slice up for filler spots)
- Glue gun
Total cost: $3 for the frame (and well, the cost of the wine too, but I don't think that counts since I'd be drinking it anyway!)
First, save up your corks. This took me a while since Bryan's not a wine drinker, so the sole responsibility for drinking all that wine was on me (tough job, huh?). I got this wine bottle gift box at Micheal's - I keep it on my counter and throw my corks in whenever I open a new bottle. The most annoying part about the corks was how many plastic corks I kept ending up with - I gave up and used both real cork and plastic, but making it all our of real corks would be nicer I think.


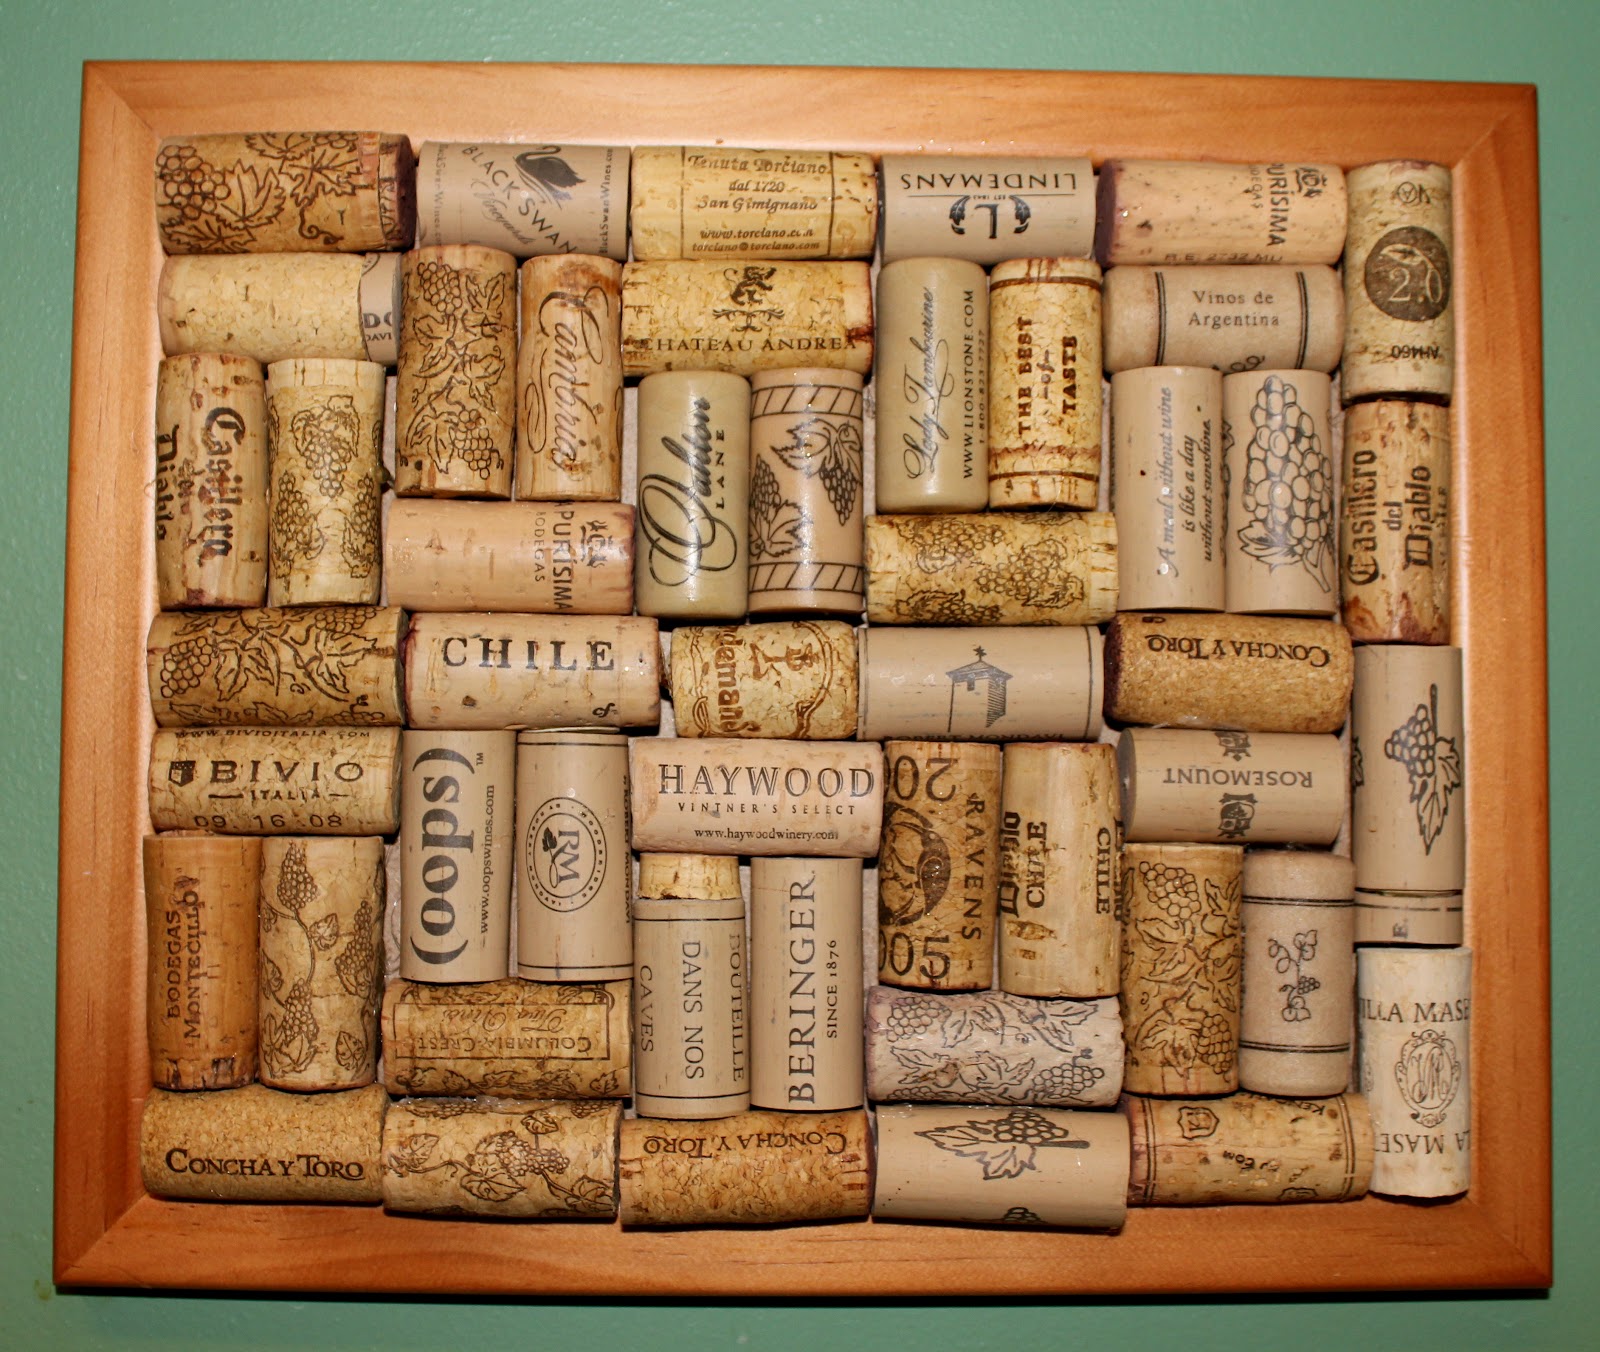
Once you're actually ready to make it, decide what pattern you want to use. I used two corks alternating horizontal and vertical. I've also seen some that are just straight across and others in a zig zag pattern. Also determine how you want to handle the edges. I just stuck a straight line of corks on the edge, which is not the prettiest but was the most simple thing to do.

Start by taking the glass out of the frame so the corks will sit directly on the backing, then lay out your corks in the pattern you decided on. I had just enough corks to make it work, and a few were shorter than others, so I sliced up some slivers of another cork to fill in any gaps. I think this could be avoided by using corks that are the same size and by being more careful in laying out your pattern.
Once you've got them laid out, then use the hot glue gun to glue your corks to the back of the frame. Then just keep on gluing until you're finished!
Here it is on my kitchen wall (admittedly a bit lumpy and not the neatest looking job, but hey, it works!). If I do this again in the future, I also want to make a bigger one with a more interesting frame.
I've been exploring for a little for any high quality articles or weblog posts on this sort of house .
ReplyDeleteExploring in Yahoo I eventually stumbled upon this site.
Studying this info So i'm glad to show that I've a very excellent uncanny feeling I
found out just what I needed. I such a lot indubitably will make certain to don?t overlook this website and provides it a glance
on a constant basis.
My blog: how to prevent cellulite
a fantastic readfind this my review herego to my site Homepagecheck out this site
ReplyDeletedirectory dolabuy More Bonuses gucci replica bags click to read more dolabuy.su
ReplyDelete7a replica bags wholesale this content q0p98q5q90 replica bags from china 7a replica bags wholesale fake gucci v6n84h0c29 replica bags india replica chanel bags ebay replica hermes bag q7q90k7d84 replica nappy bags
ReplyDelete